Hi Christian
hier ist die Version, die du wirklich 1 zu 1 kopieren kannst. Das ist als kompletter Premium Post geschrieben, also inklusive sauberem Ablauf, Tests, Beispielcode und am Ende ein Gesamtbeispiel, das direkt läuft.
Wichtig vorab
Für langfristige Integrationen nimm bitte immer ein Personal Access Token aus dem VRM Portal. Dann musst du nicht mit Benutzername Passwort arbeiten und nichts läuft nach kurzer Zeit ab. Victron beschreibt dafür den Header x authorization. (vrm-api-docs.victronenergy.com)
Ziel
Du willst am Ende den Akku SoC aus VRM lesen und in Blockly weiterverwenden.
Teil A
Token und Installation ID sauber holen
Schritt 1
Personal Access Token erstellen
1 Log dich im VRM Portal ein
2 Geh auf Settings
3 Dann Integrations
4 Dann Access Tokens
5 Create token
6 Name vergeben zum Beispiel blockly
7 Speichern
8 Token kopieren und sicher ablegen
Den Token bitte niemals öffentlich posten.
Schritt 2
Installation ID finden
1 Öffne im VRM Portal deine Anlage
2 Schau in die URL im Browser
Die sieht ungefähr so aus
https://vrm.victronenergy.com/installation/123456/dashboard
Die Zahl 123456 ist deine Installation ID.
Teil B
Erster Test ohne Blockly
damit du sofort weißt ob Token und Installation ID stimmen
Schritt 3
API Call testen mit curl
Ersetze DEIN_TOKEN und DEINE_INSTALLATION_ID und führe das aus
curl -s \
  -H "X-Authorization: Token DEIN_TOKEN" \
  "https://vrmapi.victronenergy.com/v2/installations/DEINE_INSTALLATION_ID/system-overview"
Wenn alles passt, kommt JSON zurück.
Wenn 401 kommt
Token ist falsch oder Header ist falsch
Wenn 404 kommt
Installation ID ist falsch
Hinweis zu Bearer vs Token
Für Personal Access Tokens ist es Token im Header. Das ist ein Klassiker, weil viele Beispiele im Netz noch Bearer zeigen. (communityarchive.victronenergy.com)
Teil C
SoC in der Antwort finden
und was du tust, wenn du ihn nicht siehst
Schritt 4
SoC Pfad
Im system overview sitzt der SoC in der Regel hier
records.battery.soc
Das heißt in JSON ungefähr so
{
  "records": {
    "battery": {
      "soc": 78.4
    }
  }
}
Wichtig
Je nach System kann es sein, dass battery oder soc fehlt, wenn VRM in deinem Setup gerade keinen SoC bekommt. Das ist kein API Fehler, sondern Datenlage. In dem Fall musst du einmal die komplette Antwort prüfen. Es gibt auch Fälle, wo SoC eher über Diagnostics bzw Diagnostic data kommt. (Victron Community)
Teil D
Blockly Prinzip
so baust du das in jeder Blockly Umgebung nach
Du brauchst immer diese Logik
1 HTTP GET auf system overview
2 Header setzen X Authorization Token
3 Antwort als JSON parsen
4 Pfad records.battery.soc auslesen
5 In Variable speichern
Wenn deine Blockly Umgebung einen fertigen HTTP Block hat, dann ist es meistens genau das.
Teil E
Beispielcode
damit du es sofort laufen siehst
1 JavaScript Beispiel
läuft zum Beispiel in Node RED Function Node oder in einer eigenen kleinen App
const VRM_TOKEN = "DEIN_TOKEN";
const INSTALLATION_ID = "DEINE_INSTALLATION_ID";

async function getSoc() {
  const url = `https://vrmapi.victronenergy.com/v2/installations/${INSTALLATION_ID}/system-overview`;

  const res = await fetch(url, {
    method: "GET",
    headers: {
      "X-Authorization": `Token ${VRM_TOKEN}`,
      "Accept": "application/json"
    }
  });

  if (!res.ok) {
    const body = await res.text();
    throw new Error(`VRM API Fehler ${res.status} ${res.statusText} Antwort ${body}`);
  }

  const data = await res.json();

  const soc = data?.records?.battery?.soc;

  if (soc === undefined || soc === null) {
    throw new Error("SoC nicht gefunden. Prüfe ob data.records.battery.soc existiert und ob VRM in deinem Setup überhaupt SoC liefert.");
  }

  return soc;
}

getSoc()
  .then(soc => console.log("Batterie SoC", soc, "%"))
  .catch(err => console.error(err.message));
2 Python Beispiel
läuft auf jedem Raspberry oder PC
import requests

VRM_TOKEN = "DEIN_TOKEN"
INSTALLATION_ID = "DEINE_INSTALLATION_ID"

url = f"https://vrmapi.victronenergy.com/v2/installations/{INSTALLATION_ID}/system-overview"

headers = {
    "X-Authorization": f"Token {VRM_TOKEN}",
    "Accept": "application/json"
}

res = requests.get(url, headers=headers, timeout=20)

if res.status_code != 200:
    raise SystemExit(f"VRM API Fehler {res.status_code} {res.text}")

data = res.json()

soc = None
try:
    soc = data["records"]["battery"]["soc"]
except Exception:
    pass

if soc is None:
    raise SystemExit("SoC nicht gefunden. Prüfe die JSON Antwort und ob VRM SoC liefert.")

print(f"SoC {soc} %")
Teil F
Node RED Komplettbeispiel
inklusive Polling und sauberes Ergebnis im msg
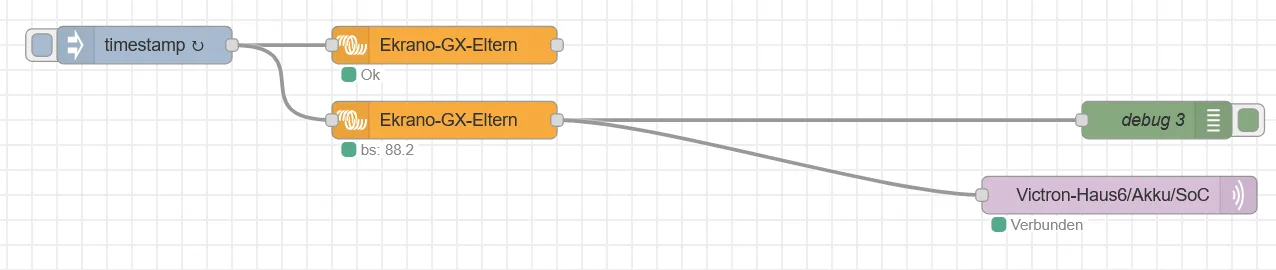
Wenn du Node RED nutzt, ist das die schnellste Variante.
1 Inject Node alle 30 Sekunden
2 HTTP Request Node
Method GET
URL
https://vrmapi.victronenergy.com/v2/installations/DEINE_INSTALLATION_ID/system-overview
3 Im HTTP Request Node Header setzen
X Authorization
Token DEIN_TOKEN
4 JSON Node zum Parsen
5 Function Node zum Herausziehen vom SoC
Function Node Code
const soc = msg.payload?.records?.battery?.soc;

if (soc === undefined || soc === null) {
  node.error("SoC nicht gefunden. Prüfe msg.payload.records.battery.soc oder ob VRM SoC liefert.", msg);
  return null;
}

msg.soc = soc;
msg.payload = soc;
return msg;
Damit hast du am Ende msg.payload gleich als Zahl und kannst es in Blockly Logik weiterverwenden.
Teil G
Gesamtcode
ein komplettes Beispiel als fertiges Mini Script
das dauerhaft läuft, SoC holt und bei Fehlern sauber reagiert
Das hier ist für Leute, die es einfach als Dienst laufen lassen wollen. Pollt alle 30 Sekunden.
const VRM_TOKEN = process.env.VRM_TOKEN || "DEIN_TOKEN";
const INSTALLATION_ID = process.env.VRM_INSTALLATION_ID || "DEINE_INSTALLATION_ID";

async function fetchSystemOverview() {
  const url = `https://vrmapi.victronenergy.com/v2/installations/${INSTALLATION_ID}/system-overview`;

  const res = await fetch(url, {
    method: "GET",
    headers: {
      "X-Authorization": `Token ${VRM_TOKEN}`,
      "Accept": "application/json"
    }
  });

  if (!res.ok) {
    const body = await res.text();
    throw new Error(`VRM API Fehler ${res.status} ${res.statusText} Antwort ${body}`);
  }

  return res.json();
}

function extractSoc(data) {
  const soc = data?.records?.battery?.soc;
  if (soc === undefined || soc === null) {
    throw new Error("SoC nicht gefunden in records.battery.soc. Prüfe ob VRM in deinem Setup SoC liefert oder ob du stattdessen über Diagnostics gehen musst.");
  }
  return soc;
}

async function loop() {
  try {
    const data = await fetchSystemOverview();
    const soc = extractSoc(data);
    const ts = new Date().toISOString();
    console.log(`${ts} SoC ${soc} %`);
  } catch (e) {
    const ts = new Date().toISOString();
    console.error(`${ts} ${e.message}`);
  }
}

setInterval(loop, 30000);
loop();
Teil H
Wenn es trotzdem klemmt
die drei Checks, die fast immer die Lösung sind
1 Header wirklich X Authorization und wirklich Token
Viele verwechseln Bearer mit Token. Für Personal Access Token muss Token rein. (communityarchive.victronenergy.com)
2 Installation ID stimmt wirklich
Nicht irgendeine Geräte ID, nicht die Portal User ID, sondern die Installation Nummer aus der URL
3 SoC wird in VRM überhaupt geliefert
Es gibt Setups, da ist im Portal keine SoC Quelle sauber vorhanden. Dann taucht soc entweder nicht auf oder du musst über andere Endpunkte wie Diagnostics gehen. (Victron Community)
Wenn du magst, mach es ganz einfach
post hier einmal den anonymisierten JSON Ausschnitt aus system overview, also nur den Teil rund um records und battery, ohne IDs ohne Namen. Dann sag ich dir exakt, welchen Pfad du bei dir nehmen musst und ob du im Zweifel besser Diagnostics abfragst.
Und ja, Premium Bereich Hinweis für alle Mitleser
Wenn du Premium machst, helfe ich dir auch beim Umsetzen als fertigen Blockly Flow, inklusive Variablen, Triggern und Alarmen, sodass du das direkt produktiv laufen lassen kannst.